https://kubernetes.io/docs/concepts/workloads/autoscaling/horizontal-pod-autoscale/
https://kubernetes.io/docs/tasks/run-application/horizontal-pod-autoscale-walkthrough/
برای اینکه metricهای سرور مانند میزان مصرف CPU و RAM را داشته باشیم باید metric server نصب کنیم.
https://github.com/kubernetes-sigs/metrics-server
kubectl apply -f https://github.com/kubernetes-sigs/metrics-server/releases/latest/download/components.yaml
اگر Metric server نصب باشد، با دستور زیر می توانیم پادهایی که بیشترین منابع را مصرف می کنند را مشاهده کنیم:

HPA:
apiVersion: autoscaling/v2
kind: HorizontalPodAutoscaler
metadata:
  name: phpapp
spec:
  maxReplicas: 5
  metrics:
  - resource:
      name: cpu
      target:
        averageUtilization: 70
        type: Utilization
    type: Resource
  minReplicas: 1
  scaleTargetRef:
    apiVersion: apps/v1
    kind: Deployment
    name: phpapp
You can check the current status of the newly-made HorizontalPodAutoscaler, by running:
# You can use "hpa" or "horizontalpodautoscaler"; either name works OK.
kubectl get hpa
The output is similar to:
NAME         REFERENCE                  TARGET    MINPODS   MAXPODS   REPLICAS   AGE
php-apache   Deployment/php-apache/scale  0%/50%    1       10       1          18s
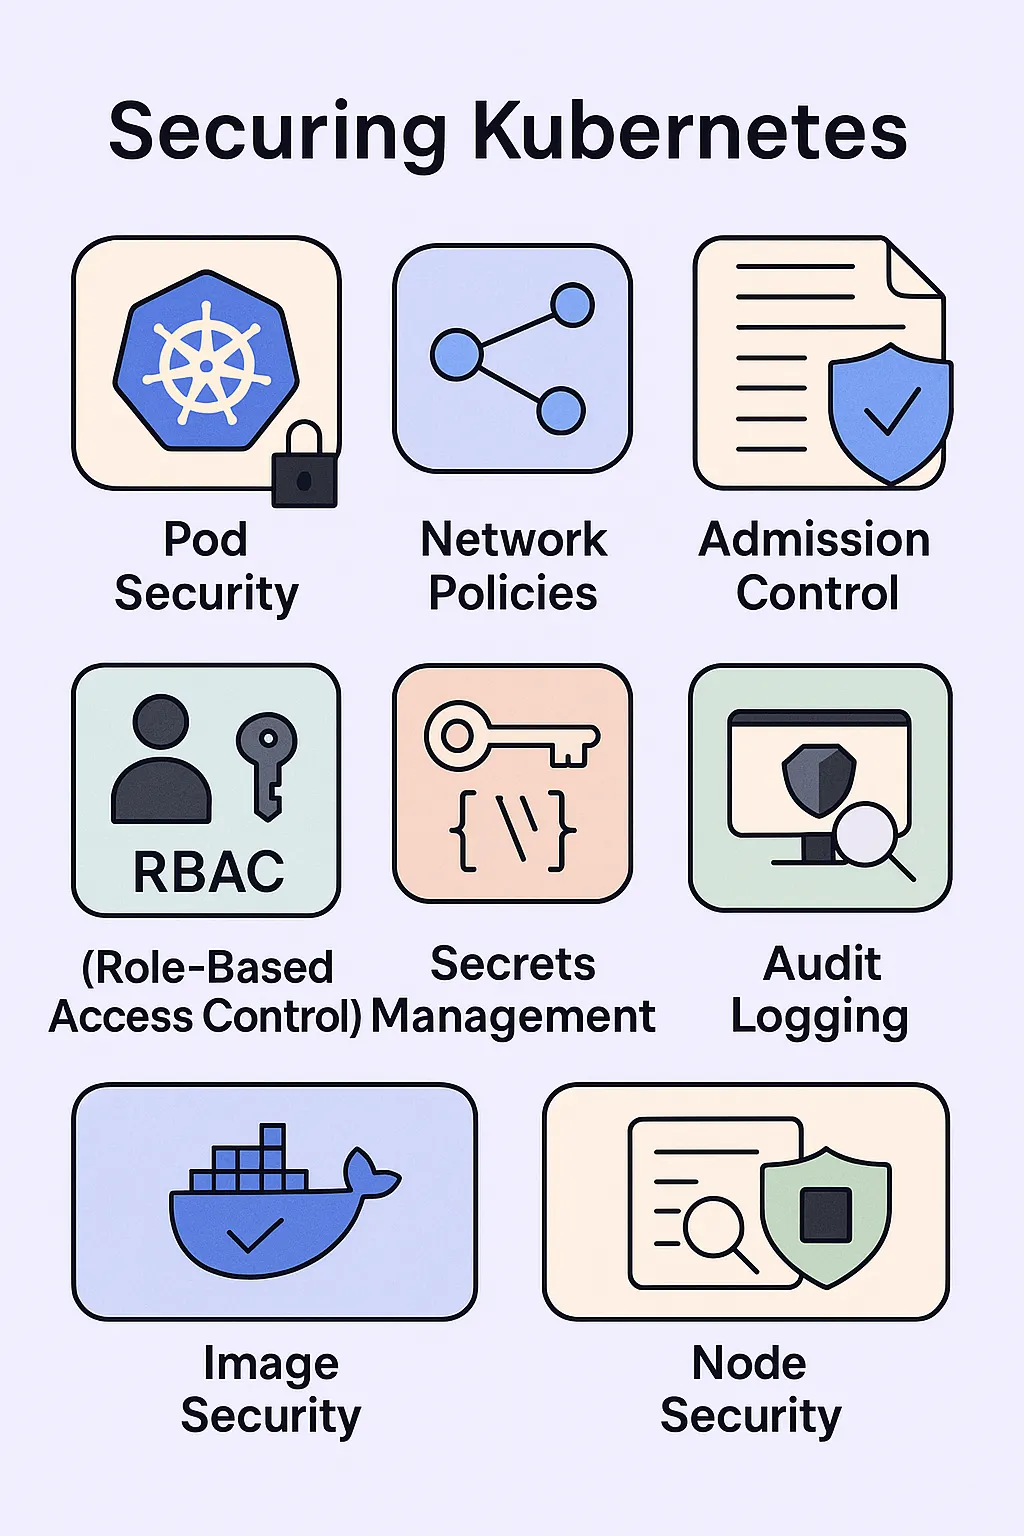
https://kubernetes.io/docs/concepts/security/rbac-good-practices/
https://kubernetes.io/docs/reference/access-authn-authz/rbac/
Here's an example Role in the "default" namespace that can be used to grant read access to pods:
access/simple-role.yaml
apiVersion: rbac.authorization.k8s.io/v1
kind: Role
metadata:
  namespace: default
  name: pod-reader
rules:
- apiGroups: [""] # "" indicates the core API group
  resources: ["pods"]
  verbs: ["get", "watch", "list"]
Here is an example of a RoleBinding that grants the "pod-reader" Role to the user "jane" within the "default" namespace. This allows "jane" to read pods in the "default" namespace.
access/simple-rolebinding-with-role.yaml
apiVersion: rbac.authorization.k8s.io/v1
# This role binding allows "jane" to read pods in the "default" namespace.
# You need to already have a Role named "pod-reader" in that namespace.
kind: RoleBinding
metadata:
  name: read-pods
  namespace: default
subjects:
# You can specify more than one "subject"
- kind: User
  name: jane # "name" is case sensitive
  apiGroup: rbac.authorization.k8s.io
roleRef:
  # "roleRef" specifies the binding to a Role / ClusterRole
  kind: Role #this must be Role or ClusterRole
  name: pod-reader # this must match the name of the Role you wish to bind to
  apiGroup: rbac.authorization.k8s.io
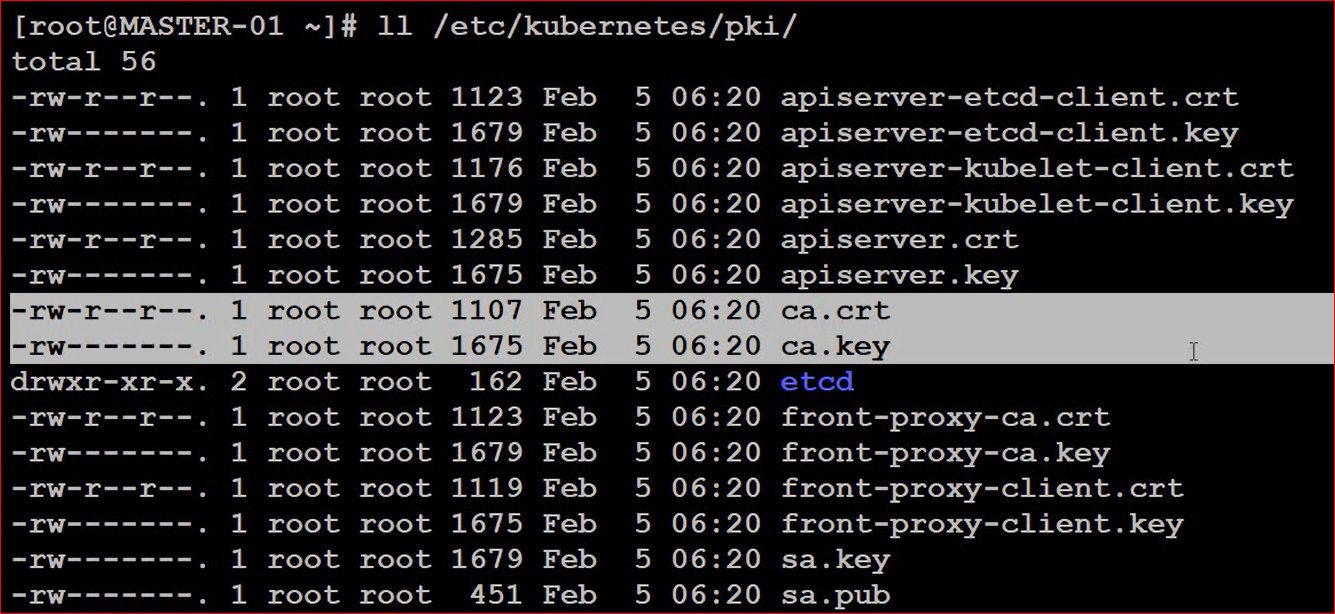
نحوه مشاهده همه کلیدهای خصوصی و certificateهای موجود در کلاستر کوبرنتیز:
اگر ما برای یک کاربر جدید در کلاستر کوبر خود کلید خصوصی و عمومی تعریف کنیم، خود این کلیدها باید توسط کلیدهای کلاستر کوبر مجددا رمز می شوند. این کار باعث می شود که هر کسی نتواند با تولید یک جفت کلید عمومی و خصوصی برای خود، بتواند در کلاستر کوبرنتیز کاربر اضافه کند.
برای اینکه یک کاربر از روی لپتاپ یا یک سرور خارج از نودهای Kubernetes بتواند با kubectl به کلاستر متصل شود و کلاستر کوبرنتیز را مدیریت کند یا یک سری از کامندهای محدود را اجرا کند، روند کلی به این صورت است:
ایجاد هویت برای کاربر (Certificate یا Token)
اعطای مجوز با RBAC
ساخت kubeconfig برای کاربر
در دسترس قرار دادن Kubernetes API Server از بیرون
1. ساخت Private Key
openssl genrsa -out user.key 2048
2. ساخت CSR
openssl req -new -key user.key -out user.csr -subj "/CN=ali/O=developers"
CN = نام کاربر
O = گروه کاربر
3. امضای Certificate
اگر CA کلاستر را دارید (مثلاً در kubeadm):
openssl x509 -req \
  -in user.csr \
  -CA /etc/kubernetes/pki/ca.crt \
  -CAkey /etc/kubernetes/pki/ca.key \
  -CAcreateserial \
  -out user.crt \
  -days 365
4. ساخت Role یا ClusterRole
مثلاً اجازه مشاهده Podها:
apiVersion: rbac.authorization.k8s.io/v1
kind: ClusterRole
metadata:
  name: pod-reader
rules:
- apiGroups: [""]
  resources: ["pods"]
  verbs: ["get","list","watch"]
اعمال:
kubectl apply -f role.yaml
5. Bind کردن Role به کاربر
apiVersion: rbac.authorization.k8s.io/v1
kind: ClusterRoleBinding
metadata:
  name: ali-pod-reader
subjects:
- kind: User
  name: ali
  apiGroup: rbac.authorization.k8s.io
roleRef:
  kind: ClusterRole
  name: pod-reader
  apiGroup: rbac.authorization.k8s.io
6. ساخت kubeconfig
kubectl config set-cluster mycluster \
  --server=https://<API_SERVER>:6443 \
  --certificate-authority=ca.crt

kubectl config set-credentials ali \
  --client-certificate=user.crt \
  --client-key=user.key

kubectl config set-context ali-context \
  --cluster=mycluster \
  --user=ali

kubectl config use-context ali-context
این فایل را به کاربر می دهیم.
اگر کاربر خارج از نودها است، باید بتواند به آدرس API Server دسترسی داشته باشد، مثلاً:
https://k8s.example.com:6443
یا
https://10.10.10.5:6443
بنابراین باید:
پورت 6443 روی فایروال باز باشد.
آدرس API Server از شبکه کاربر قابل دسترس باشد.
در صورت استفاده از Load Balancer، آدرس آن را در kubeconfig قرار دهید.
میتوانید kubeconfig ادمین را نیز در اختیار او قرار دهید (برای محیطهای Production توصیه نمیشود):
/etc/kubernetes/admin.conf
یا نسخهای از آن با آدرس API مناسب برای دسترسی خارجی ایجاد کنید.
https://kubernetes.io/docs/concepts/services-networking/network-policies/
There are two sorts of isolation for a pod: isolation for egress, and isolation for ingress.
An example NetworkPolicy might look like this:
service/networking/networkpolicy.yaml
apiVersion: networking.k8s.io/v1
kind: NetworkPolicy
metadata:
  name: test-network-policy
  namespace: default
spec:
  podSelector:
    matchLabels:
      role: db
  policyTypes:
  - Ingress
  - Egress
  ingress:
  - from:
    - ipBlock:
        cidr: 172.17.0.0/16
        except:
        - 172.17.1.0/24
    - namespaceSelector:
        matchLabels:
          project: myproject
    - podSelector:
        matchLabels:
          role: frontend
    ports:
    - protocol: TCP
      port: 6379
  egress:
  - to:
    - ipBlock:
        cidr: 10.0.0.0/24
    ports:
    - protocol: TCP
      port: 5978
Default policies
By default, if no policies exist in a namespace, then all ingress and egress traffic is allowed to and from pods in that namespace. The following examples let you change the default behavior in that namespace.
You can create a "default" ingress isolation policy for a namespace by creating a NetworkPolicy that selects all pods but does not allow any ingress traffic to those pods.
service/networking/network-policy-default-deny-ingress.yaml
---
apiVersion: networking.k8s.io/v1
kind: NetworkPolicy
metadata:
  name: default-deny-ingress
spec:
  podSelector: {}
  policyTypes:
  - Ingress
This ensures that even pods that aren't selected by any other NetworkPolicy will still be isolated for ingress. This policy does not affect isolation for egress from any pod.
If you want to allow all incoming connections to all pods in a namespace, you can create a policy that explicitly allows that.
service/networking/network-policy-allow-all-ingress.yaml
---
apiVersion: networking.k8s.io/v1
kind: NetworkPolicy
metadata:
  name: allow-all-ingress
spec:
  podSelector: {}
  ingress:
  - {}
  policyTypes:
  - Ingress
With this policy in place, no additional policy or policies can cause any incoming connection to those pods to be denied. This policy has no effect on isolation for egress from any pod.
You can create a "default" egress isolation policy for a namespace by creating a NetworkPolicy that selects all pods but does not allow any egress traffic from those pods.
service/networking/network-policy-default-deny-egress.yaml
---
apiVersion: networking.k8s.io/v1
kind: NetworkPolicy
metadata:
  name: default-deny-egress
spec:
  podSelector: {}
  policyTypes:
  - Egress
This ensures that even pods that aren't selected by any other NetworkPolicy will not be allowed egress traffic. This policy does not change the ingress isolation behavior of any pod.
A default deny-all egress policy also blocks DNS traffic. If your workloads need DNS resolution, you must add a separate NetworkPolicy that allows egress to your cluster's DNS service.
If you want to allow all connections from all pods in a namespace, you can create a policy that explicitly allows all outgoing connections from pods in that namespace.
service/networking/network-policy-allow-all-egress.yaml
---
apiVersion: networking.k8s.io/v1
kind: NetworkPolicy
metadata:
  name: allow-all-egress
spec:
  podSelector: {}
  egress:
  - {}
  policyTypes:
  - Egress
With this policy in place, no additional policy or policies can cause any outgoing connection from those pods to be denied. This policy has no effect on isolation for ingress to any pod.
You can create a "default" policy for a namespace which prevents all ingress AND egress traffic by creating the following NetworkPolicy in that namespace.
service/networking/network-policy-default-deny-all.yaml
---
apiVersion: networking.k8s.io/v1
kind: NetworkPolicy
metadata:
  name: default-deny-all
spec:
  podSelector: {}
  policyTypes:
  - Ingress
  - Egress
This ensures that even pods that aren't selected by any other NetworkPolicy will not be allowed ingress or egress traffic.